SCIENCE EXPERIMENTS FOR KIDS
HOW TO DO AN EGG DISSECTION
Lay the foundation for good scientific learning with this eggs-periment that can’t be beat


Tested, edited & approved by:
Kevin Shoban,
Science Educator
This animal is not on exhibit in the habitats. It is one of our Animal Ambassadors and is used in public and school programs.
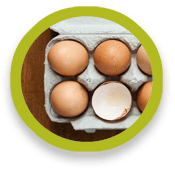
Which came first, the chicken or the egg? Sorry, this experiment won’t answer that question, but it will teach your aspiring scientists how to dissect an egg and maybe come up with some terrible puns of their own.
Oviparous animals are animals who lay eggs, and eggs are a common household food. Before you crack that egg on a pan, crack up with your child as you explore and learn all about the inside parts of an egg through this wholesome egg dissection experiment. The best part is once you finish the dissection, you can turn it into a delicious scramble!
GATHER THIS:
- One raw egg
- One shallow container
- One sharp pointy device (Exacto knives work great! Just be careful)!
THEN DO THIS:
- Before you begin, ask your child questions about what they notice throughout the dissection. This helps them learn to formulate questions and help you direct the dissection through their inquiries.
- Hold your egg over the shallow container. This will help keep all the inside parts of your egg contained while you make observations.
- Locate the “bottom” of your egg. The bottom is the less pointy side.
- Carefully make a tiny puncture in the center of the bottom by chipping away the very first layer of your egg; the shell. The eggshell is a hard, porous, calcified membrane protecting the inside egg. Chip away just enough to see the next layer of your egg (around a pinky nail width is enough).
- Right under the shell is a very thin paper like layer, which is another protective layer, called the outer shell membrane. Let your child gently feel the membrane once enough of the shell is removed.
- Next, cut through the outer shell membrane to reveal the air cell. This air cell collects and stores air, which comes in through the pores of the shell allowing the embryo to receive oxygen. When you and your child look through the hole of the outer membrane, you will see yet another membrane! This layer is the inner shell membrane.
- Turn the egg upside down to demonstrate how the membrane holds everything inside!
- Now, widen the original hole and puncture the inner membrane. Make the hole large enough to pour the whole egg into the container. Make the hole big enough to ensure the yolk will not run. The egg white is clear and called the albumen. The runnier part of the albumen is the thin albumen, and the viscous part is the thick albumen. If the yolk was not punctured, it should stay together like a sunny side up egg.
- Look closely at the yolk to see if it has a small white spot called the germinal disc. This is is where an embryo would form if the egg was fertilized.
- Why doesn’t the yolk run all over the container? Because it is covered with… you guessed it, another membrane called the yolk membrane! On both sides of the yolk, you will see tiny, white, rope-like strands. These strands are called calizae and attach to the yolks membrane, holding the yolk in place at the center of the egg, so it won’t bounce around and break.
- Now, cut into the egg yolk and watch it run all over your container. Make any other observations and ask your child questions as you explore your egg together. When you are done, throw the egg on the frying pan, or cook it up anyway you like so not to waste a delicious treat!
ASK THIS:
- Why does the egg have so many membrane layers protecting it?
- Do you have anything on the outside of your body protecting what’s inside?
- Why do you think the egg needs an air cell?
- Is your skin porous like an egg?
- What’s your favorite way to eat eggs?
WHAT IS HAPPENING?
Eggs you typically buy from the supermarket are not fertilized. This means there never was a chance for a chick to develop in the egg. Chickens (and other birds) will often lay non-fertilized eggs, which are collected daily by farmers. Only chicken eggs fertilized by a rooster can have a baby chick grow inside of it. If you happen to have a source of fertilized eggs, this experiment can be that much more interesting!
Eggs have so many membranes to protect all the parts of the egg and ultimately the chick growing inside. The albumen and yolk are all part of the baby chick’s water and food source while inside the egg. Once that food is consumed, it is time for the chick to break free from the egg and rely on its mother for a couple days before it learns to find food on its own.
WHAT THIS TEACHES:
Skills: Observation, formulating questions
Themes: Animal biology, dissection
Join the CuriOdyssey Community
LOCATION
1651 Coyote Point Drive
San Mateo, CA 94401
Ohlone Land Acknowledgement
650-342-7755
info@curiodyssey.org
CuriOdyssey is a 501(c)(3) non-profit, Tax ID 94-1262434


