Blog
Re-purposed: Cereal Boxes for Gift-giving
If you’re like most people, you probably eat your way through cereal, cookies, crackers, and myriad other things that are sold in cardboard boxes. While these cardboard containers are easily recycled, we recently wondered if there was a way to get just one more use out of this ubiquitous item before it landed in a recycling facility.
Luckily, Jan, who works in our exhibits department, is brimming with creative ideas to re-purpose everyday materials. She came up with a brilliant way to upcycle a cereal box into a beautiful piece of art for gift giving. Give it a try! This activity is meant for a parent and child to work on together.
What do I need?
Cereal, cracker, cookie or other dry food box
clear tape or narrow masking tape
2” wide masking or duct tape
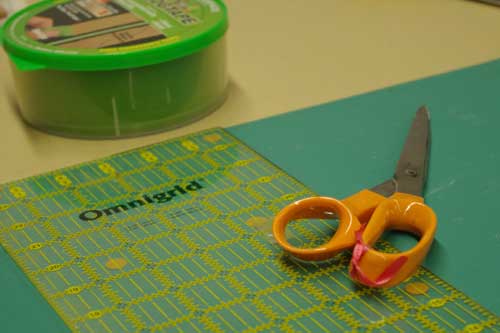
Scissors
Ruler
Pencil
What do I do?
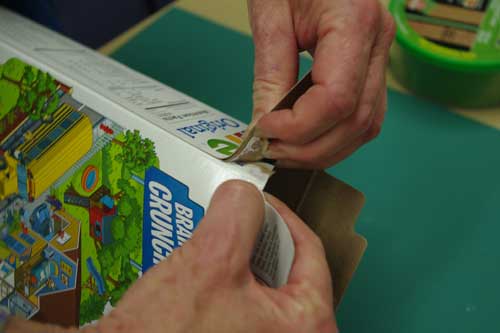
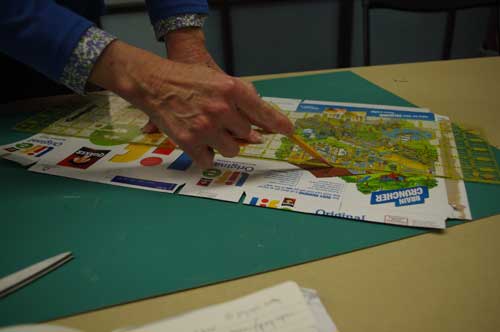
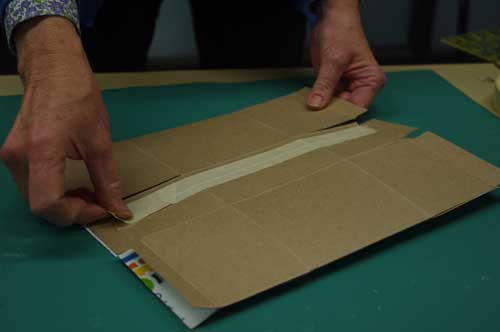
Carefully pry open the bottom and side seams of an empty cereal box.*
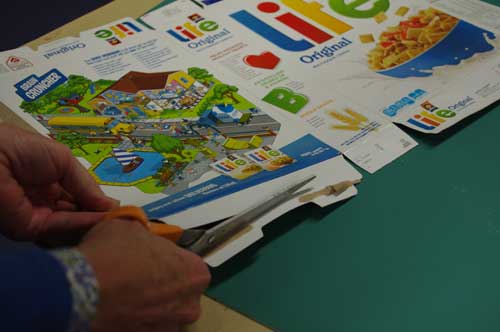
Trim the top and bottom edges even, removing any cuts that serve as closure slots.
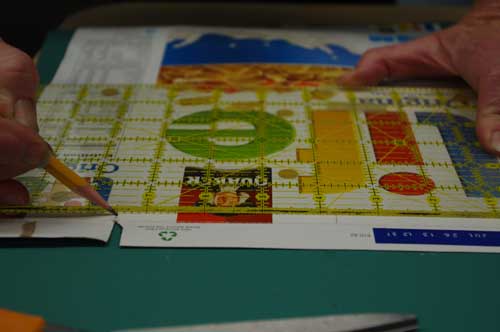
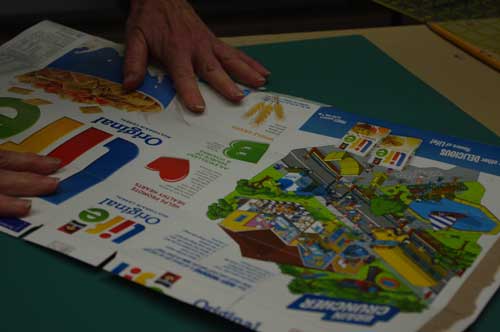
On the printed side of the flattened-out box, score vertical lines down the centers of the front and back panels. Measure the width of the original box (the front or back panel of the flattened version) and mark the centers of those panels. (For example: on a cereal box that is 7.5 inches across, place marks at 3.75 inches at the top and bottom of the front and back panels.) Using a straight edge, connect the marks with a very heavy pencil line.
Score two horizontal lines across the entire box (again on the printed side), at a distance from the top and bottom edges equal to half the width of the front panel. (In our example, our horizontal lines would be 3.75 inches from the top edge and 3.75 inches from the bottom edge).
Fold (pressing firmly) and unfold along each of the four score lines, printed side in.
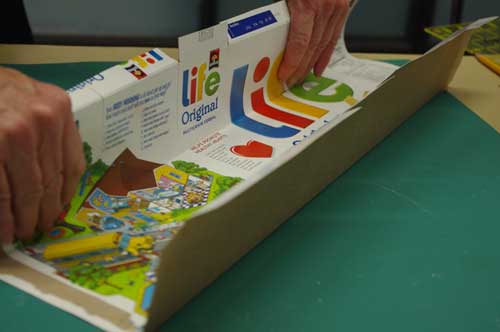
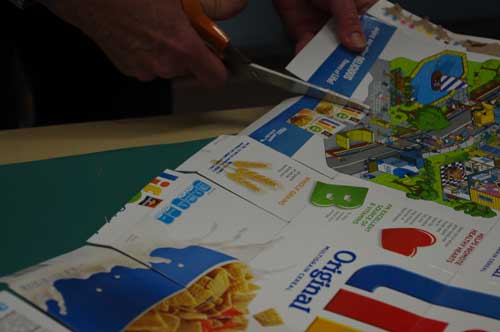
Cut along every vertical crease from the top and bottom edges to the horizontal score lines. There will be six cuts from the top edge and six from the bottom edge, which in our case, will each be 3.75 inches long. This creates the new “floor” and “ceiling” flaps.
With printed side in, fold the box in half so that the narrow (half inch) side tab overlaps the pried-open glue seam. Using narrow tape, reseal the whole seam (this tape will be covered later with wider, colored tape).
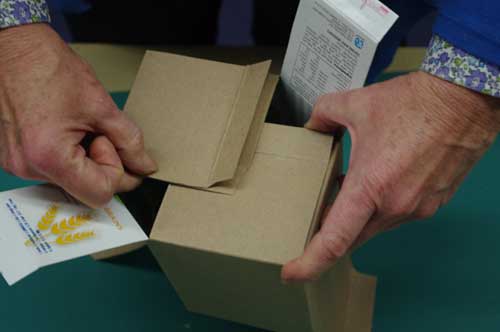
Holding the box open, like a tube, fold in the bottom tabs to create a hexagonal floor.
How? Overlap the two square flaps from the front panel, placing a tape loop between to hold the flaps together. Do the same with the two square flaps from the back panel. This holds the new walls at a 90-degree angle (for you geometry lovers). Note that the two sets of square tabs are offset from each other with some amount of overlap.
Now, fold the rectangular side flaps in, overlapping each other a bit and covering the square tabs below. Tape these final flaps together. They don’t need to be taped to the flaps below.
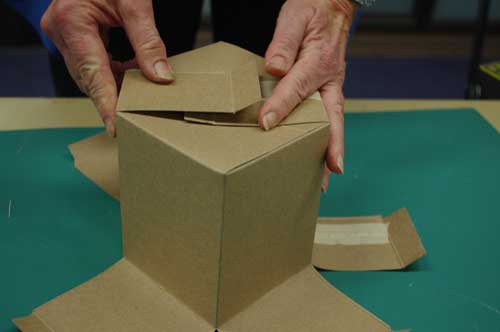
Fold and overlap the flaps on the top of the box in the same way, but leave un-taped. You may want to use a paper clip to secure the tabs.

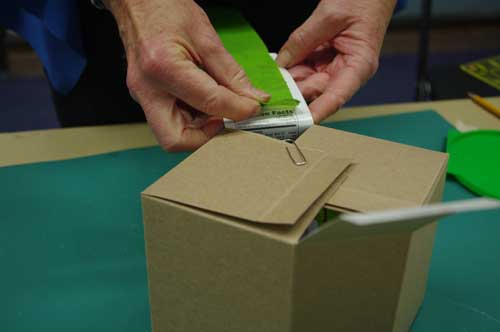
Because many food boxes are 2 inches thick, a 2-inch colored tape works well to both secure the box together and serve as a decorative “ribbon.” Tape one long piece of tape across the bottom rectangular flaps, continue up one side panel and across the top rectangular flap, and wrap the tape a bit to the inside. Apply a second strip of tape across the bottom and up the other side, covering the other flap and wrapping to the inside.
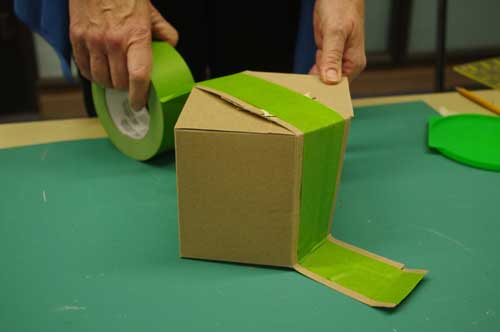
The colorful taped flaps will be secured over the square ones once the box is filled. They can be overlapped to lie flat (under a bow) or tied together (through punched holes) to make a handle of sorts and create a space for other decorative embellishment.
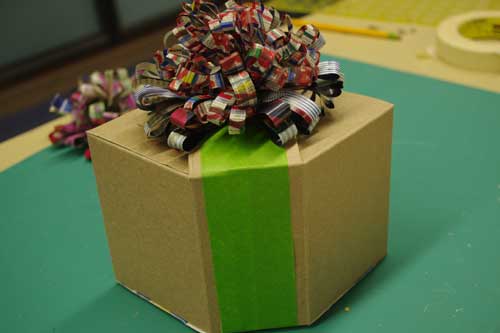
Voilà! Now you have a repurposed box that’s perfect for gift-giving any time of the year.
* (Feeling extra crafty? Repurpose the liner bag! Many dry food boxes, especially cereal boxes, have strong inner bags with seams that can be carefully pulled apart. This bag yields a “placemat” that is tough, washable, waterproof and reusable as a portable work surface for wet, sticky or otherwise messy craft projects. The bag can also be cut into strips for tying gift boxes closed or used intact as a liner for your new box to keep your homemade cookies fresh! Can you think of any other household uses for this strong, waterproof material that usually goes straight to the landfill? Let us know!
[Our re-purposed cereal box activity was developed by Jan Scardina]
Related Posts


Join the CuriOdyssey Community
LOCATION
1651 Coyote Point Drive
San Mateo, CA 94401
Ohlone Land Acknowledgement
650-342-7755
info@curiodyssey.org
CuriOdyssey is a 501(c)(3) non-profit, Tax ID 94-1262434

